How to Transfer Photos from iPhone to External Hard Drive
By Joakim Kling - Last Updated: Contact Author
It is maybe because that you've run out of space on your computer for backing up thousands of photos, or you just want to archive certain photos onto a more spacious external hard drive or NAS (network attached storage) induvidually for better classification than using flash drives. However, the default backup of iPhone only allows you to save all files to partition C. And without a proper backup extractor, you cannot even view a single piece of photos from backup files. Then, how to save those photos from iPhone to an attached storage device for a much easier archiving and viewing?
Method 1 - Transfer Photos from iPhone to External Hard Drive with DearMob
DearMob iPhone Manager can be an efficient tool to bridge your iPhone storage with external drives on computer. Without putting extra load on your PC windows 10, this light weight tool can swiftly batch export over 7K pieces of photos in batch from iPhone directly to computer attached storage devices.
Preparation: Free download DearMob iPhone Manager, install and launch it on your Windows 10 computer.
Step 1: Connect your iPhone to external hard drive attached computer via a lightning cable
Wake up your iPhone and trust the computer if not properly connected.
DearMob iPhone manager will auto-detect your device and display your device info including battery health, available storage space, iOS version, Firmware version, Unique Chip ID, serial number etc.
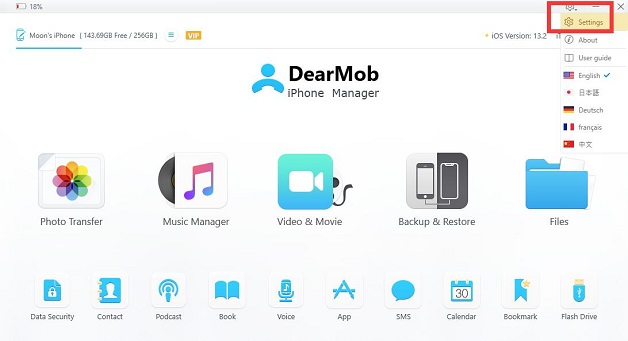
Step 2: On the main UI, click the gear wheel icon and choose Settings on the drop-down menu

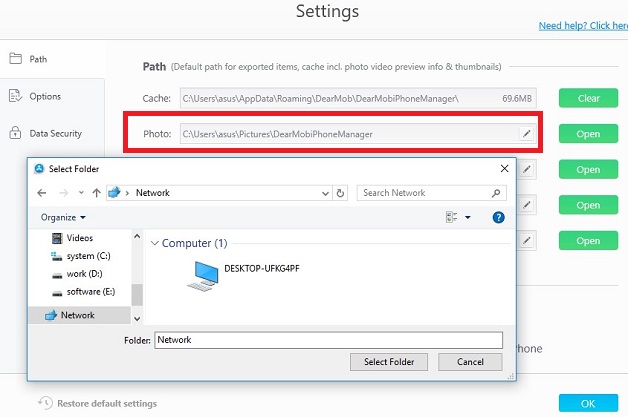
Step 3: Under the Path tab, find Photo's path and click edit

Here, you can change the target path for exporting photos to external hard drive, NAS, or flash drives, etc.
Step 4: Click Photo Transfer tab on the main UI and go to the album interface.

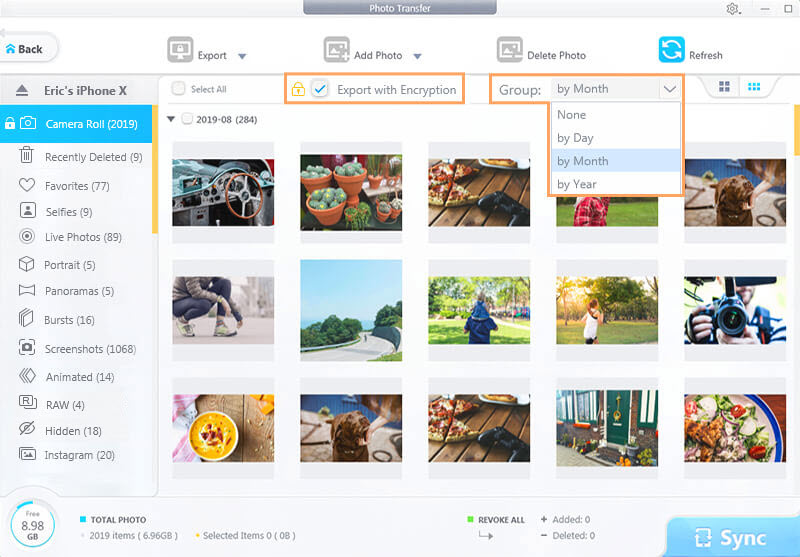
Step 5: Select photos by album or date/month/year and click Export
DearMob Photo Export Tips:
• Export to private photo albums: You can choose password protect your iPhone photos upon export by ticking the "Export with Encryption" check box.
• HEIC to JPEG: You can directly transfer
HEIC photo to JPEG without finding an extra photo format converter.
• Smart Organize: By sorting photos by albums as same as those in iPhone, you can easily pinpoint photos by date/month/year.
Method 2 - Move Pictures from iPhone to External Hard Drive via File Explorer on Windows 10
To move photos directly from iPhone to external hard drive, you can also avoid downloading any third-party tool
Step 1. Connect your external hard drive or flash drive, or your NAS device with computer.
Step 2. Connect your iPhone with computer via cable.
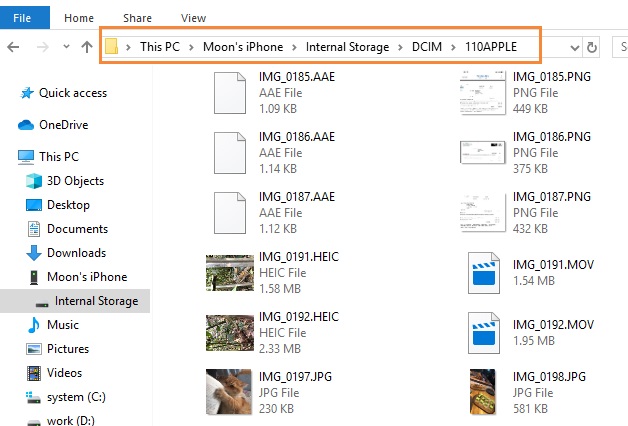
Once you connected your iPhone with Windows 10 PC, the File Explorer auto pops up and your iPhone is detected showing the "Internal storage".
Step 3. You can now double click Internal Storage > DCIM > APPLE.

Step 4: Go pick a batch of photos that you want to move from your iPhone to external hard drive.
Step 5: Drag and drop to copy to your external hard drive listed on the left sidebar.
The biggest disadvantage of using Windows 10 File Explorer to transfer photos from iPhone to external drive is that it is really barbaric at reading iPhone photos. It cannot read AAE files, which means that you cannot export edited photos from iPhone to external drives. And Windows 10 computers cannot read HEIC photos unless you install an HEIC viewer. You can only view the thumbnail of HEIC photos in the File Explorer.
Also, you may encounter device connection failure issues, which can be resulted from Apple USB drive missing.
Besides back up photos to an external hard drive, there are also other ways to transfer and backup iPhone photos selectively, as viewable copies.


