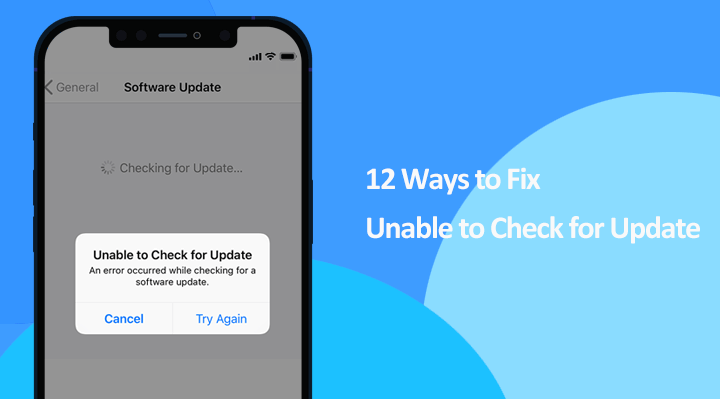
Apple always aims to make iOS better with regular updates. However, there are times when upgrading your iPhone or iPad can be a bit of a hassle, and you might encounter that annoying message: "Unable to check for update: An error occurred while checking for a software update". No need to panic, though! In this guide, we'll share why this frustrating issue happens and provide you with 10 tried-and-true solutions to resolve the "iPhone unable to check for update" problem.
Why Does the iPhone or iPad Say Unable to Check for Update
There are four main reasons why your iPhone or iPad displays the message "Unable to Check for Update: An error occurred while checking for a software update".
Insufficient Storage: While the actual iOS update file size is 1-2 gigabytes, you'll need to have a bit more free storage space on your device to successfully install the update. This additional space is necessary for the update package to be unpacked and applied to your device. It's a common requirement during software updates to ensure that the process can be carried out smoothly.
Weak Network: To ensure a smooth and successful iOS update, it's crucial to have a strong and stable network or Wi-Fi signal, as a weak or unreliable connection can result in issues such as the inability to check for updates on your iPhone and download failures for the update package.
Device Incompatibility: The iPhone model you own may not be compatible with the latest iOS update. Apple often releases updates that are only compatible with newer devices, and older models may no longer receive updates due to hardware limitations.
Apple's Servers Overloaded: When Apple releases a new iOS update, there is often a surge in users trying to download it simultaneously. This can put a strain on Apple's update servers, leading to delays and difficulties in checking for updates. During such periods, you may encounter the "Unable to Check for Update" message.
No matter what causes leading to the error that the iPhone or iPad is unable to check for updates, you can try the solution below to get things fixed.
10 Solutions to iPhone Unable to Check for Update
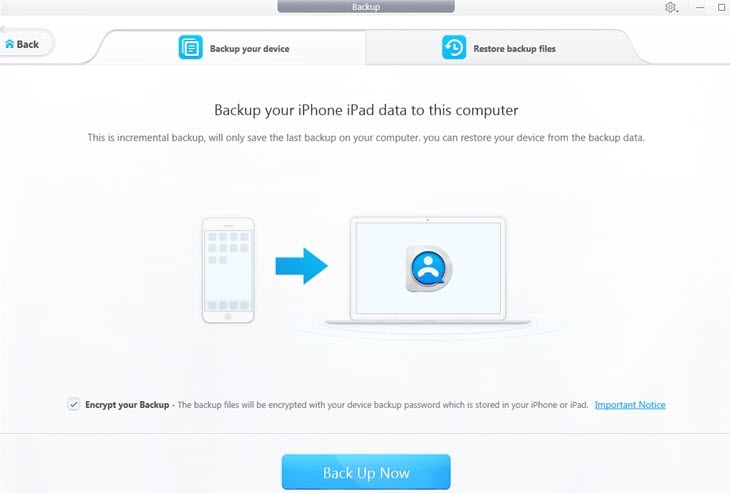
Before we get down to it, we strongly suggest you back up your iPhone to the computer or the external hard drive in case of any unexpected problem, so you won't lose your data.
Solution 1. Turn the iPhone or iPad Off and then On
When your iPhone or iPad fails to check for an update, the first step to fix the issue should be restarting the device.
To Turn Off the iPhone
• iPad and iPhone X or later: Press and hold the side button and either volume button simultaneously.
• iPhone 8 or earlier: Press and hold the top or side button (depending on your device) until the slide to power off slider appears. Swipe it from left to right. Your iPhone will then shut down.
To Turn On the iPhone or iPad
After the iPhone or iPad has powered off, wait for a few moments. Press and hold the side (or top) button until you see the Apple logo on the screen. Release the button, and your iPhone or iPad will boot up.
Solution 2. Force Restart iPhone
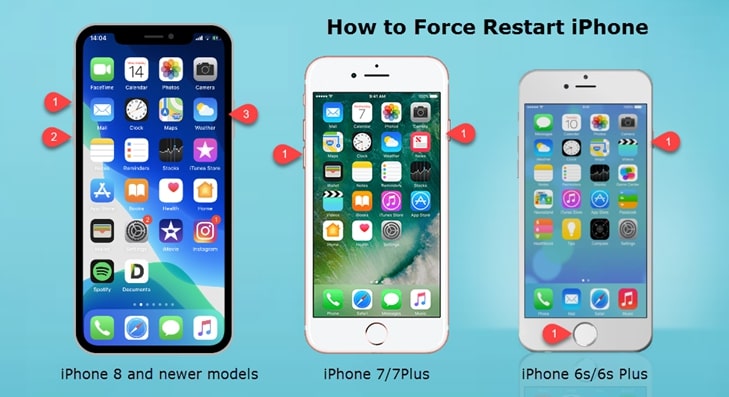
Forcing a restart can be a helpful step when you encounter a system issue like iPhone says unable to check for update. This can abruptly terminate all running processes, effectively clearing any minor glitches that may be causing the error. Here's how to force restart different iPhone and iPad models:
• iPhone 8 or later: Quickly press and release the volume up button. Press and release the volume down button. After that, press and hold the power button until you see the Apple logo on the screen.
• iPhone 7 and iPhone 7 plus: Simultaneously press and hold both the power button and the volume down button until the Apple logo appears.
• iPhone 6s or earlier: Press and hold both the power button and the home button until the Apple logo appears.
• iPad without the Home button: Press and quickly release the upper volume button. Press and quickly release the lower volume button. Press and hold the top button untile the Apple logo appears.
• iPad with the Home button: Press and hold the top button and the Home button simultaneously until you see the logo of Apple.
Solution 3. Free the Storage Space
To ensure a successful download and installation of an iOS or iPadOS update, it's important to have sufficient storage, preferably at least 2GB. There are several methods to optimize the storage of your iPhone and iPad, such as deleting storage-hungry apps, clearing app caches, and removing large video or music files. However, the best way is to use DearMob iPhone Manager. This robust iPhone management tool provides a range of features to optimize your iDevices' storage efficiently without risking the loss of precious data.

Why Should You Pick DearMob iPhone Manager
- Selective or full backup and restoration of iPhone and iPad data
- Efficiently organize, delete, and view 15+ types of iPhone iPad data
- Effortless data transfer between iPhone and computer, or between iPhones
- 0 Learning curve. Rapid and stable file transfers without freezing
- Extra features like video file compression, file encryption, and more
Step 1. Download DearMob iPhone Manager on your computer. Connect your iPhone or iPad to your computer with a lightning cable that supports data transfer.
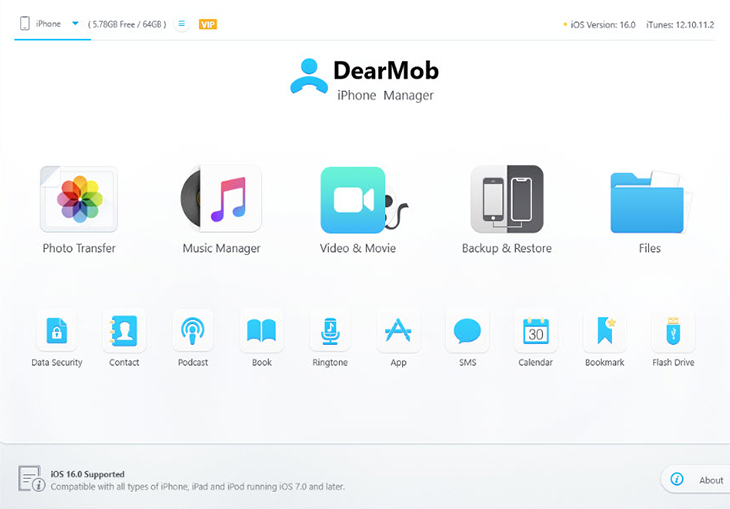
Step 2. Click the needed module on the main interface. For instance,
- To backup or delete iPhone photos, click Photos Transfer.
- To backup, delete, or manage music files stored on your iPhone or iPad, click Music Manager.
- To delete unwanted videos or compress large videos, click Video & Movie.
- To back up the entire iOS device, click Backup & Restore.
Step 3. (Optional) If you are creating a full iPhone backup, you can factory reset your iPhone or iPad to optimize storage space.
Solution 4. Check the Internet Connection
To avoid your iPhone stuck on saying "Unable to Check for Update", it's essential to check the status of your Wi-Fi network. If you encounter issues with your current Wi-Fi connection, consider using your mobile data as a reliable backup option, even though the download may be slower. Alternatively, if you have access to another Wi-Fi network, connecting to it can significantly improve the download process for the iOS update package.
Solution 5. Have Sufficient Battery Charge
To get rid of the error that the iPhone or iPad is unable to check for update, ensure your iOS or iPadOS device has at least 50% battery charge or is connected to a charger. Low battery levels can disrupt the update process, which is a common consideration for all smartphones.
Solution 6. Stop Using VPN
Using a VPN on your iPhone or iPad may render your device can't check for new software updates and show the "Unable to Check for Update" popup. VPNs often route your connection through servers in different regions, potentially causing update restrictions. Moreover, the added layers of encryption and routing inherent to VPNs may interfere with your device's communication with Apple's update servers. Thus, it's recommended to disable your VPN and switch to your regular network.
Solution 7. Use Date and Time Provided by Network
To avoid any hassles when checking for iPhone or iPad software updates, it's crucial to use the date and time provided by your network. This synchronization with your network's time settings ensures that your device aligns with Apple's official update release schedule, reducing the risk of update-related issues or errors.
Solution 8. Delete iOS Beta Version Profile
Betas are essentially early testing versions that come before the official release. Every iOS update undergoes this beta phase, regardless of whether it's a minor improvement like 15.7.2 or a major release like iOS 16. However, if you've already installed a beta version on your device, you won't receive new updates through the regular settings. To get the latest update, you'll need to remove the beta version first and then proceed with the update.
Step 1. Go to Settings on your iPhone and tap General.
Step 2. Scroll down the screen to find Profile and tap it.
Step 3. Tap the beta version and choose Delete profile.
Solution 9. Update Using iTunes
Updating your iPhone through an Over-the-Air (OTA) update requires a robust network connection, and sufficient battery life, and can often take a bit of time. Due to these considerations, it's not uncommon to encounter the 'iPhone unable to check for update' error when using OTA updates. Therefore, it's a good idea to upgrade your iPhone through iTunes. One important note: Before proceeding with an iTunes update, be sure to back up your essential device data using DearMob iPhone Manager to avoid potential data loss.
Step 1. Install the latest version of iTunes on your Windows or Mac computer.
Step 2. Connect your iPhone to the computer using the original iPhone cable.
Step 3. Click on your device pop-up on the screen and hit Summary.
Step 4. Click on Check for Update which is located on the upper right side of the iTunes main interface.
Step 5. Hit Download & Install to confirm the update. Enter the passcode on the pop-up window.

Solution 10. Check for the Compatibility
Apple stops providing updates for certain older devices each year. For example, iOS 16 is exclusively available for iPhone XR and newer models. If your iPhone 7 or 6 cannot check for an iOS 16 update, it's because these devices are not supported by the new iOS version.


