It's wonderful to have access to the iTunes music library from any device. And you may do this by adding music to Google Play Music. Some users discover they are unable to upload iTunes purchases to Google Play because some of the songs in their library are DRM-protected and can only be played on specific devices. Apple's use of DRM (Digital Rights Management) to prevent piracy is a fine idea, but it poses issues for consumers who have bought music for their own fair use.
One of the most flexible free cloud music storage options among the big brands is provided by Google Play. You may stream your own music on your Android or iPhone by using Google Play, which allows you to upload up to 50,000 of your own music files. Here in this guide, we'll show you 3 ways to transfer music from iTunes to Google Play.
Update:
Google Play Music is no longer available. Months in advance, Google announced the switch from Google Play Music to YouTube Music, along with instructions on how to transfer all of their content. You're out of luck if you still want to access your Google Play Music content beyond the cutoff date. For users who want to transfer music from iTunes to Google Play, you may need to transfer music from iTunes to YouTube Music.
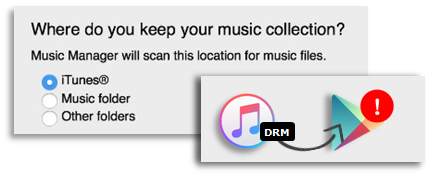
1. Transfer Music from iTunes to Google Play – DRM Music
This method only works for DRM music your purchase from iTunes Store. You cannot burn or rip Apple Music. Before you start, make sure you have DVD drive on your computer, and prepare a blank rewritable CD (CD-RW), which can be formatted and reused up to 1000 times. Otherwise, you will need lots of CD-Rs if you have a large library. A CD-RW is capable of storing 80 minutes of music, so you can burn dozens of songs, rip them, format the CD and repeat the burning until you rip all your desired songs. Here are detailed steps:
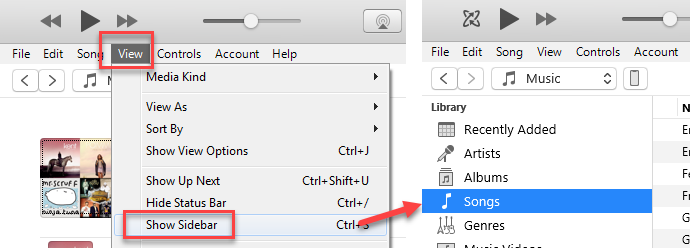
Step 1: Launch and sign in iTunes with your Apple ID that have iTunes purchase music. Then click "Songs" at the sidebar. If you cannot see a sidebar, click View> Show Sidebar.
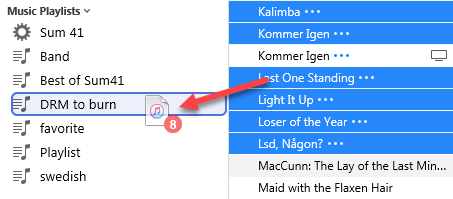
Step 2: Create a playlist and drag songs that you want to burn to CD into this playlist. To do so, just right click below the Music Playlists and click "New Playlist". Then use "ctrl/command + click" to select songs that you purchased from iTunes store, and drag them into the newly created playlist.
- If you have a large library, you could make use of sorting by "kind" to quickly distinguish protected songs from other type such as Apple Music or uploaded. Right click on the bar above your songs list (where you see with Name, Artist, and Album), and click to check "Kind" and "iCloud Status".
- You can burn up to 70-75 minutes of songs to one CD-RW (though it might claim to be capable of 80 minutes). Make sure songs you drag into the waiting-to-be-burned playlist won't exceed that length.
- You cannot burn songs from Apple Music, i.e., songs made available to you on a subscription basis where you pay a monthly fee and have access to its entire library.
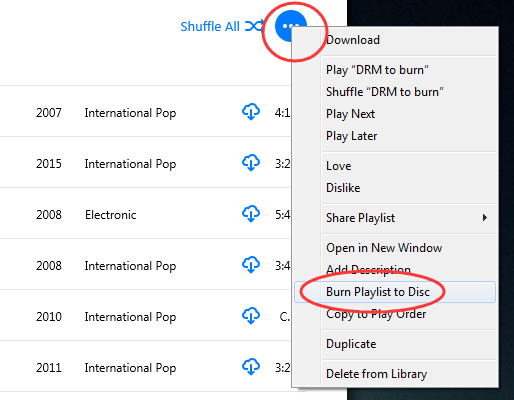
Step 3: Insert your CD into the drive to burn songs. Hit newly created playlist, and click the three-dot icon. In the drop-down menu, click "Burn Playlist to Disc". Make sure to check "Audio CD" in the pop-up window, click "Burn"
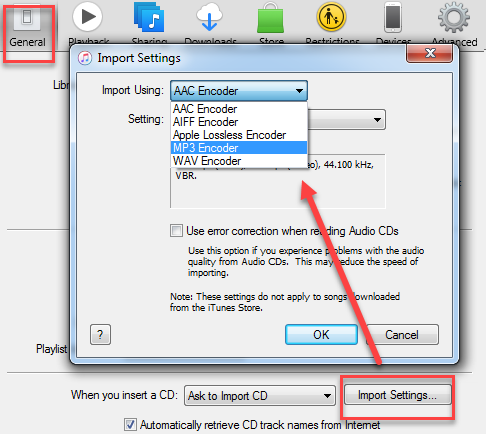
Step 4: When the burning is done, you shall be able to see the content on the CD and import music from CD to your library. iTunes convert music to AAC by default, if you want to have MP3 version, go to edit>preferences>general> import settings, and choose MP3 Encoder.
Step 5: Format the CD and repeat step 2-4 to burn another 70-some minute of songs and rip them into iTunes library.
Step 6: Select iTunes folder when you upload songs from local drive to Google Play Music.
- For Window users, go to C:\Users\Administrator\Music\iTunes\iTunes Media\Apple Music.
- For Mac users, go to Finder>Users folder>Your user name>Music folder>iTunes.
2. Transfer Music from iTunes to Google Play - 1-Click Solution
How to transfer songs from iTunes to Google Play in the easiest way? DearMob iPhone Manager offers a 1-click DRM removal solution. Follow the steps below to upload DRM-laden tracks to Google Play.
DearMob iPhone Manager - An Easy iOS Tool to Manage Apple Music and More Files
- Unlock your purchased music for you to enjoy everywhere
- Extract music, photos, videos, books from iPhone to your drive
- Smart built-in to convert files into mainstream formats with 1-click
- Manage iPhone the way you interact with Windows and Android system
Download and Install Dearmob iPhone Manager on your Windows PC or Mac. Follow the steps below to remove DRM from Apple music and transfer music from iTunes to Google Play Music/YouTube Music.
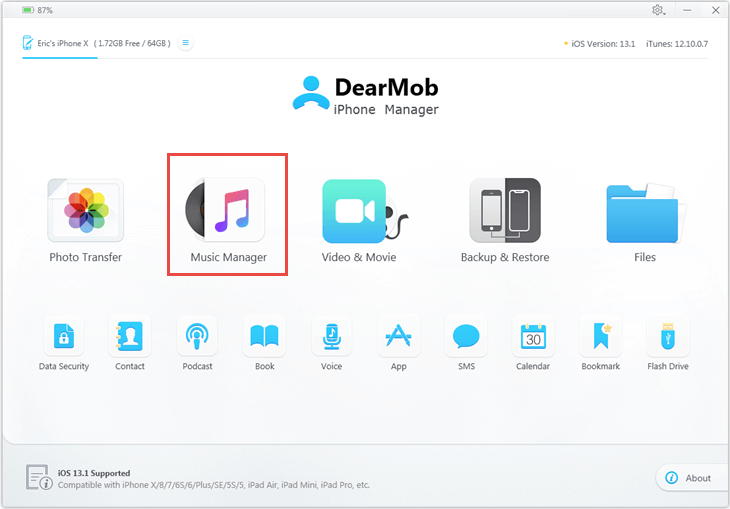
Step 1. Plug-in your iPhone to computer and launch DearMob iPhone Manager, and go to Music module.
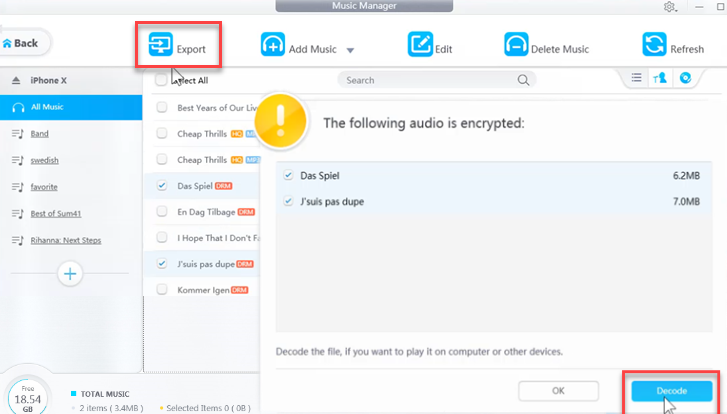
Step 2. Select DRM music and click "Export", or simply drag songs to any folder you want.
Step 3. Hit "Decode" to remove DRM from Apple music (.m4p), and you just wait while DearMob iPhone Manager converting m4p to mp3.
Step 4. Folder containing unlocked DRM music will pop out, and then you can transfer songs from iTunes to your computer.
- Default path for unlocked DRM music on Windows: C:\Users\Administrator\Music\DearMobiPhoneManager
- For Mac users, go to Finder>Documents>DearMob>unDRM.
- You can also rip DRM from TV shows, movies and digital books in a similar manner.
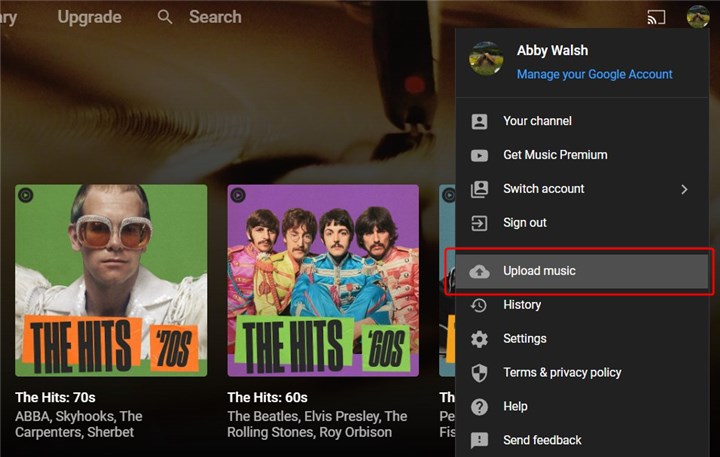
Step 5. Then you need to log in your YouTube Music account and click Upload music to upload music from computer to YouTube Music.
The Bottom Line
Besides converting M4P to MP3 to fix "can't transfer iTunes purchases to Google play", DearMob iPhone Manager is also an easy-to-use iOS tool to backup iPhone, transfer photos, videos, songs, contacts, podcast, calendar events, bookmarks from iPhone to computer and backward, with smart built-ins to set custom ringtone and auto covert incompatible formats. Guess what, you can also unlock DRM videos and digital books with this tool.
Free download DearMob iPhone Manager:
About The Author


