If you plan to switch from Chrome, Firefox, Internet Explorer, etc to Safari, you'll wonder how to import bookmarks to Safari to keep your favorite sites safe and easily accessible on Safari later. Visit each web page on Safari one after another and bookmark each site individually. Come on, that's really a huge task. Here, we'd like to teach you how to 1-click export all bookmarks from Chrome/Firefox and import bookmarks to Safari on Mac/iPhone/iPad massively at once.
1. Export Bookmarks for Web Browsers
You’d better export bookmarks from your browser before backing up or moving them to a new Mac. Here, we take the most popular Chrome and Firefox as an example:
Export bookmarks from Firefox:
1. Open your Firefox > click on the icon like this > click Bookmarks > scroll down to the bottom and click Show all Bookmarks.
2. From the toolbar on the Library window, click Import and Backup to choose Export Bookmarks to HTML.
3. In the pop-up window, choose a location to save your file, which is by default named bookmarks.html, and then click Save.
Export bookmarks from Chrome:
Open your Google Chrome > click the Customize and Control Google Chrome icon in the top right > choose Bookmarks > Bookmark Manager > click Organize > Export Bookmarks to HTML File > choose a location for the HTML File and click Save.
When saving all bookmarks as an HTML file on the desktop, you can open the file in Safari, but it just displays a web page with all of your bookmarks. If you want to check a standalone one on iPhone iPad, you need to import bookmarks to Safari.
2. Import Bookmarks to Safari on iPhone/iPad
Importing bookmarks to Safari on Mac is quite easy, but how about importing bookmarks to Safari on iPhone or iPad? A lucky thing is that you can get this job done in just a few clicks, barely costing you any time.
After exporting bookmarks from your browser as HTML following the above steps, we then can import bookmarks to Safari on iPhone iPad via DearMob iPhone Manager .
It is a versatile tool for iPhone iPad data management besides importing bookmarks to Safari and exporting Safari bookmarks. Compatible with iOS photos, music, video, contacts, podcasts, books, voice memos, apps, messages, calendars, and bookmarks, DearMob iPhone Manager makes your digital life much easier.
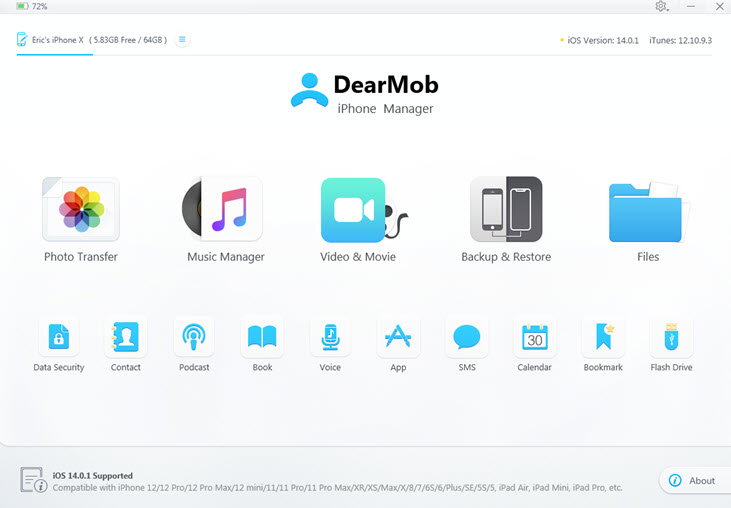
Step 1. Download, install, and launch DearMob iPhone Manager on your Mac.
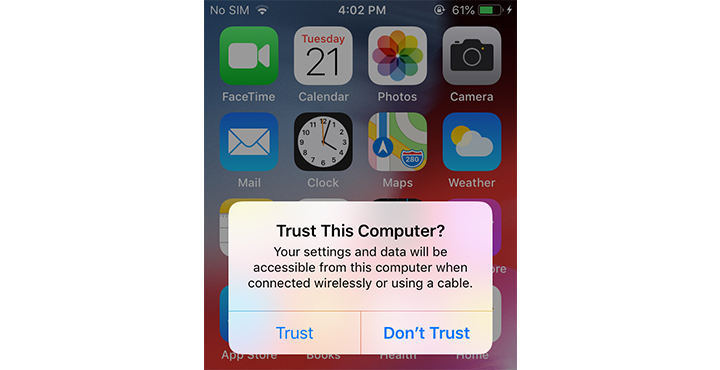
Step 2. Connect your iPhone iPad to your computer via USB cable or Wi-Fi, and tap "Trust This Computer" to make the computer recognize your device if a message pops up on your iOS device.

Step 3. Once connected, click on the "Bookmark" icon on the main UI of DearMob iPhone Manager to access the Import window.

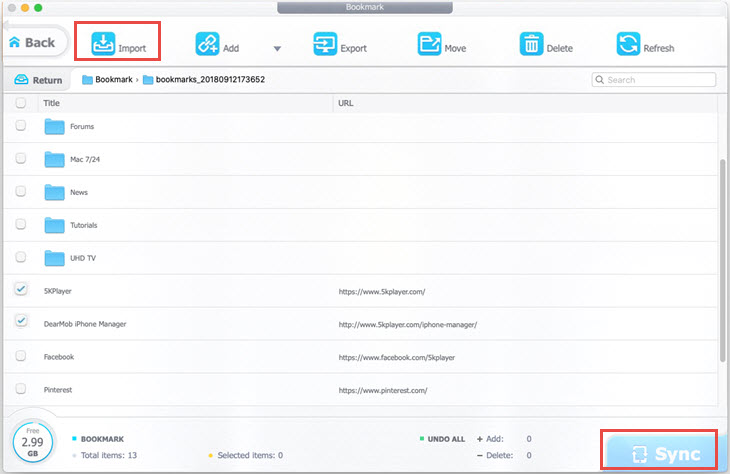
Step 4. Click the "Import" icon on the top bar, choose the bookmarks you want to import to Safari, click Open, and then click "Sync" on DearMob iPhone Manager, and your bookmarks will be automatically synced to your iPhone iPad Safari.

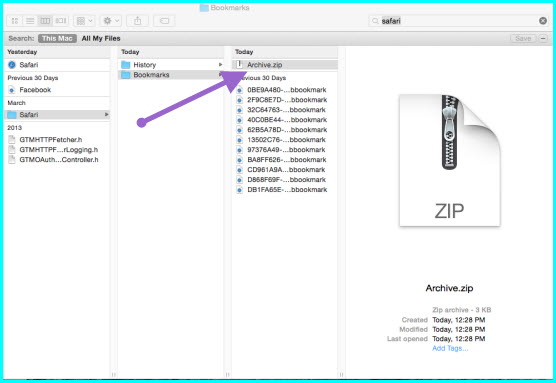
Note: If your iCloud storage space is enough, it is available for you to sync Safari bookmarks imported from Google Chrome to iCloud and share across OS X and iOS by clicking System Preferences > iCloud > Safari. And using iTunes to import bookmarks to Safari only works on older Mac OS, as you can only sync contacts and calendars with iTunes if you use OS X Mavericks v.10.9 or later.
How to Import Bookmarks to Safari on Mac
In case that you are talking about how to import bookmarks from Chrome or Firefox to Safari on Mac computer, you can refer to the following way:
Bookmarks in your default browser Firefox or Chrome: Choose File > Import From > Google Chrome or File or Import From > Firefox, then select the items you want to import. You can do this any time after you start using Safari, even if you imported items already.
HTML file you saved on a computer: Start Safari on Mac > click on the File menu at the top of the Safari window and choose Import Bookmarks (If you don't see the menu bar, just press the Alt key) > choose the HTML file you saved from Firefox or Chrome and click on Open, then the bookmarks will be imported to your Safari. You can find them at the bottom of the sidebar in a new folder whose name begins with "Imported" and ends with the date.


