How to download CD to iPhone or other devices and listen to them on the go?
Here, we'll introduce you to 2 simple steps to put CD on the iPhone and we will explain in detail the pattern of CD to iPhone music transfer with iTunes or not using iTunes. So it is a must-see for those who want to put CD on an iPhone or NAS!
- I want to put a CD with teaching materials on my iPhone so that I could stream to the soundbox and share it with my students. What should I do?
- I want to put songs from a CD on my iPhone, what should I do? I would appreciate it if you could explain it in an easy-to-understand manner.
- I think it would be easier if I could borrow a rental CD, import it to my iPhone, and return it. Is there a method other than iTunes at home for the songs imported to the iPhone?
How to transfer music from CD to iPhone without iTunes?
Are you having trouble downloading the CD to your iPhone? Let's check out how to transfer the songs from the CD to your iPhone together!
Step 1: Download CD to computer
There are many tools to rip and download music from CD to computer - Windows Media player, as a free built-in tool preinstalled on your PC, Handbrake - an open source media converter, and Winx DVD ripper - a professional media transcoder. Whichever to choose, it depends on the CD and your budget.
But, if you happen to have Windows Media Player preinstalled on your computer, try it out first won't take too much time. You can easily resort to other software tools once it failed.
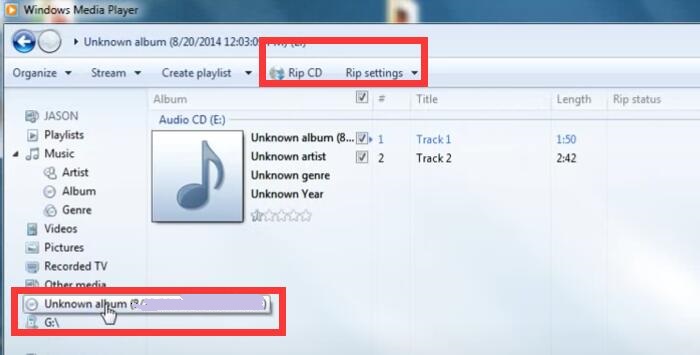
Procedure 1. Insert the CD into the CD drive of your computer, and launch Windows Media Player;
Procedure 2. The set CD is displayed on the left side, so click it;
Procedure 3. Click the "Rip CD" button (a CD icon with an arrow down).
You may find other ripping choices in Rip settings when you'd like to change the output format and quality. Bluray disc won't be ripped. And for more info on how to rip DVD using Windows Media Player, you can also refer to it here.
Step 2. Download CD to iPhone;
At this stage, you might think about iTunes. But that's not the right answer since it may erase all your existing songs on iPhone if you click Sync. With all the songs from CD ripped to your local computer, you can import the songs to iPhone via a USB drive or wirelessly. But for batch import to iPhone, we'd always recommend you DearMob iPhone Manager.
Tip: You need a specialized tool to transfer music from CDs to iPhone. This time, I'm using a tool called "DearMob iPhone Manager". It works as both a transfer tool and a converter tool to guarantee 100% migrant success of all the ripped songs to iPhone. Next, I will explain in detail each step of importing songs from CD to iPhone without using iTunes.
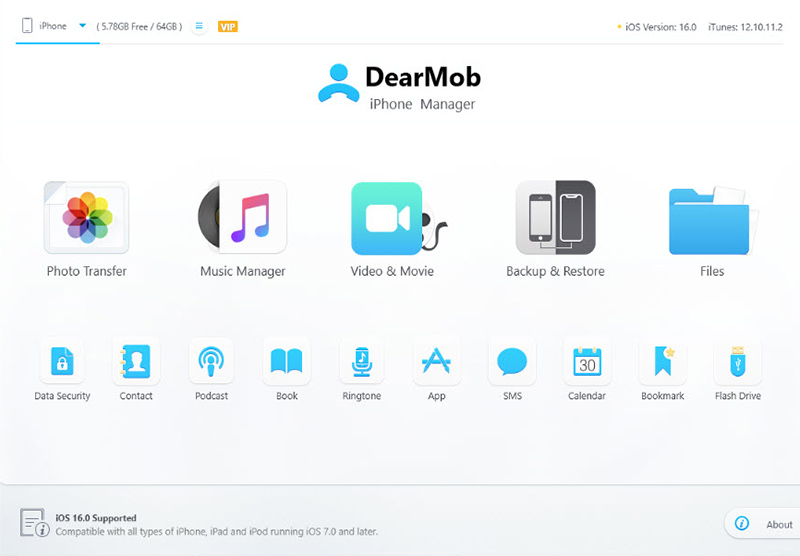
Procedure 1. Launch Manager and USB connect iPhone to computer;
Procedure 2. Click the "Music Management" button at the main interface to enter the music management screen;
Procedure 3. Click the "Add Music" button in the menu above, find the storage location for the CD songs you just imported to your computer, select the CD songs you want to import to your iPhone, and click the "OK" button. Press to start saving CD from PC to iPhone;
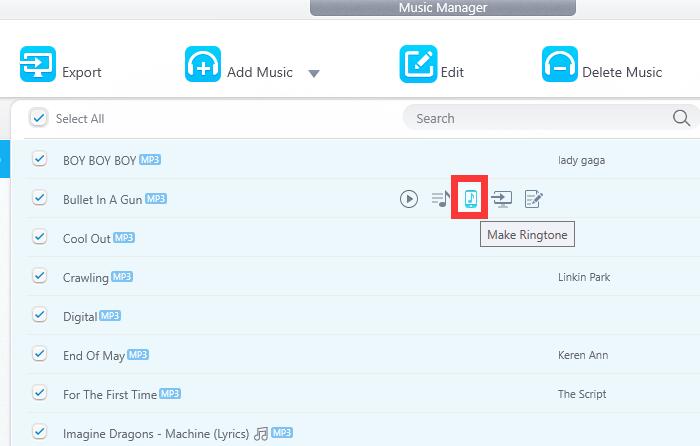
Procedure 4. After the transfer was finished, you'll be able to transfer the songs from CD to iPhone by clicking the "Sync" button at the bottom right.
Now you can listen to your favorite music in the Apple Music app on your iPhone, anytime, anywhere.
Why choose DearMob iPhone Manager to download CD to iPhone?
- Do not overwrite - Syncing music from CD to iPhone, the existing songs will not be overwritten or deleted.
- Two-way transfer - Not only can you transfer videos from computer to iPhone, but you can easily import videos from your iPhone to your computer.
- Supports audio transcoding - Even if the ripped songs are incompatible with iPhone, DearMob can auto-convert them to MP3/AAC compatible formats.
- Overwhelmingly fast transfer speed - Importing 1GB file to iPhone only take about 2 minutes.
How to transfer music from CD to iPhone with iTunes?
Procedure 1. Start "iTunes" installed on your computer and insert the music CD into your computer. The "Import Confirmation Screen" will be displayed. Click "Yes".
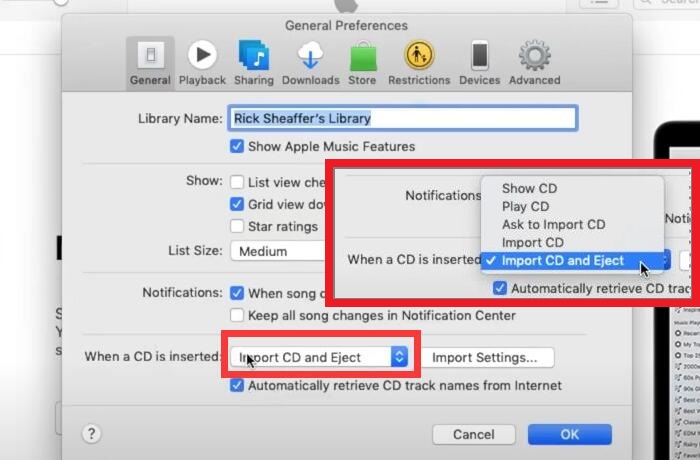
Note: If there's no Import confirmation pop-up, you can also go to the Preferences to make sure the "Import CD and Eject" is enabled. You can also tweak the file coding format and quality by hitting Import Settings...
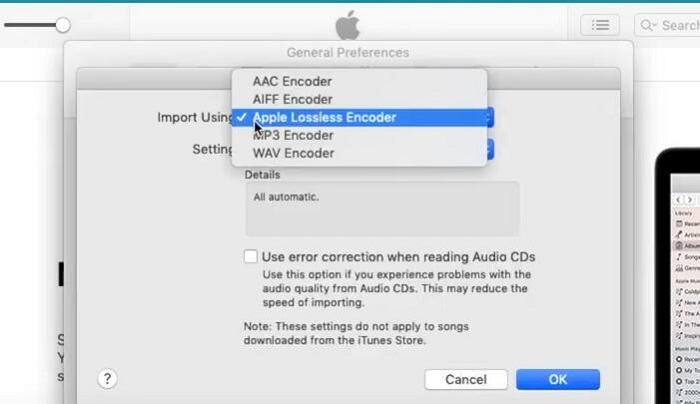
Procedure 2. Then click "OK" and "OK". The song import will start, and all you need is to wait.
Procedure 3. When the import completes, the CD will be auto ejected. You can check and play it in "Library" in "Music" of iTunes.


